New feature that permits to use SQL to write the value directly to the machine ( available from Alleantia 5.1.1)
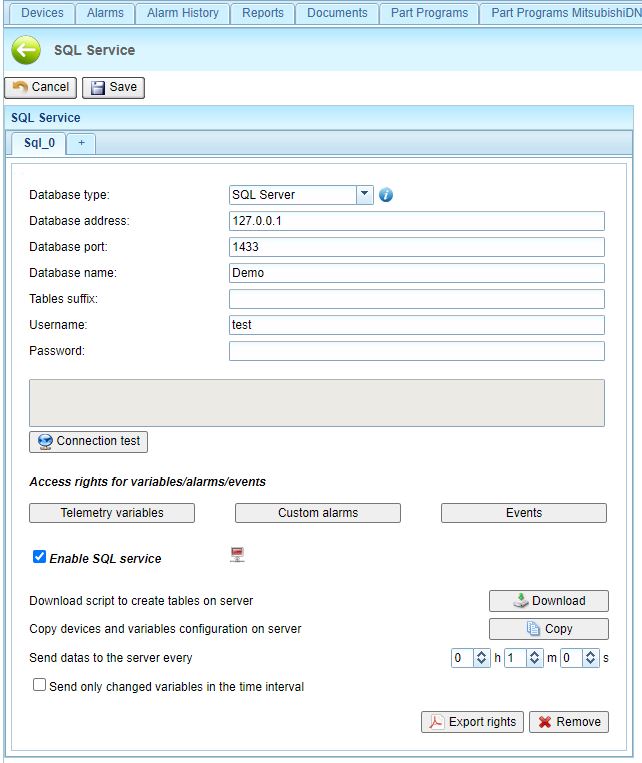
First, select the type of database to connect to ISC application, from the dropdown menu in the configuration window (Database type)


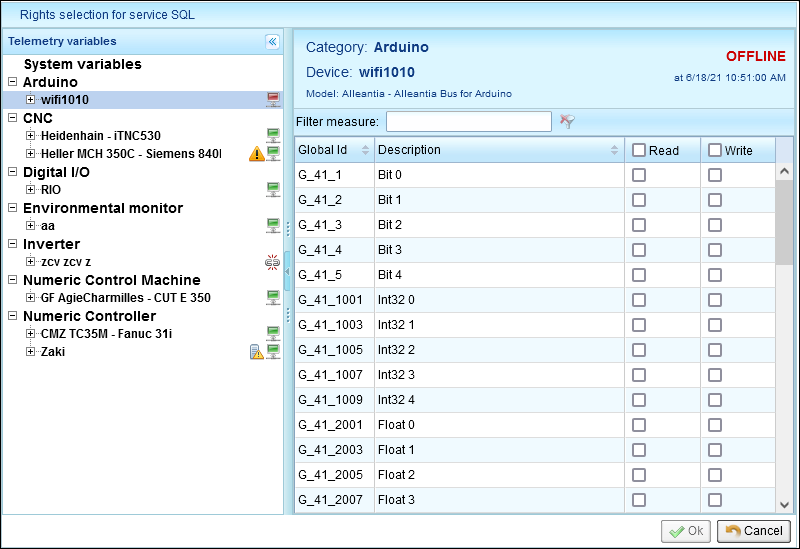
Select the desired variables to receive from DB by clicking on the "Telemetry variables" button:

For each variable that you want to write from DB you must enable Write checkbox in the relative row.
You also do this with Custom alarms and events
Then, on MySQL or SQL Server database, create again a database with compatible structure with IoT SCADA application. Click “Download script” to download the script of the creation of a new database on SQL platform, that contains all the dable needed to read data from IoTScada and to write data to IotSCADA.
After having entered the connection parameters to the database (IP address, Port, Database name, Tables suffix, Username, Password), check the connection by clicking “Connection test”. the message “Connection Success” will be shown.
The Written table is structured as follow:
| ID | DEV_ID | VAR_ID | DESCRIPTION | VALUE | TO_WRITE | WRITTEN | TIMESTAMP | SN |
| 1 | 1 | 56 | ||||||
The first colomn (ID) is autoincrement.
To write a value to IOTSCADA, you must filling the fields DEV_ID, VAR_ID ,VALUE, TO_WRITE and SN (the dev_id and the var_id must be enabled in IOT SCADA as shown before).
The field TO_WRITE enables Alleantia to read that row.
So when you complete the row with the fields required( as shown in the table above )you write 1 in field TO_WRITE .
The field SN must contain a serial number (known also as Machine ID) of the Alleantia ISC Installation.
After that Alleantia takes this information and write in field WRITTEN the result(1 =SUCCESS, 0 FAILED) and the timestamp of the operation.
Be careful : Once you have done the operation you must fill a new row in order to make a new operation.
If you need support don't hesistate to contact us
