How to connect Alleantia IoT Edge to Microsoft Azure IoT Hub?
Find out how to easily connect Alleantia to Azure Microsoft
In Microsoft Azure portal, after creating IoT Hub, get the connection string.
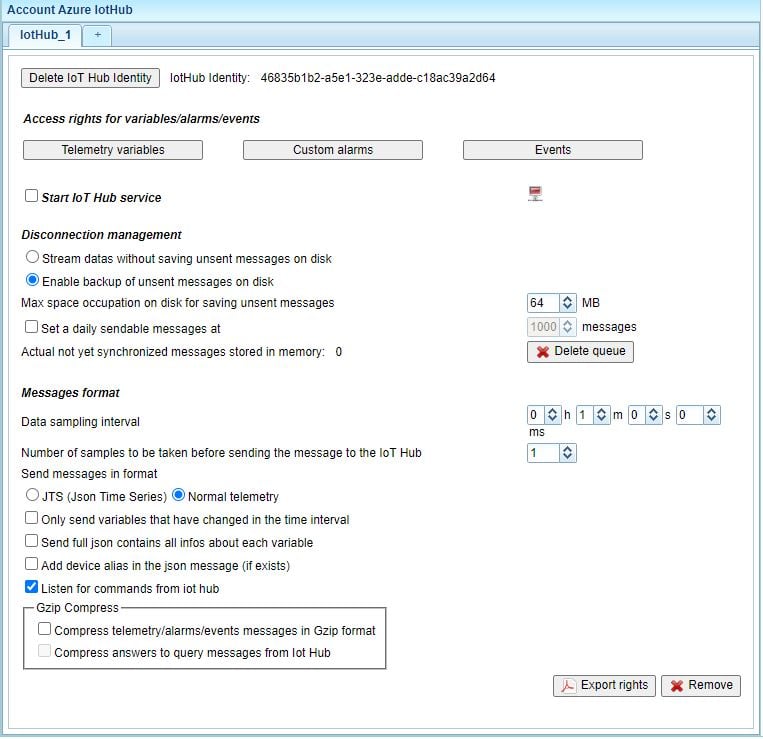
Insert the string into the box in configuration panel. Then press Create IoT Hub Identity button to register the device in IoT Hub.
If the registration was successful, Device ID will be displayed next to the button.

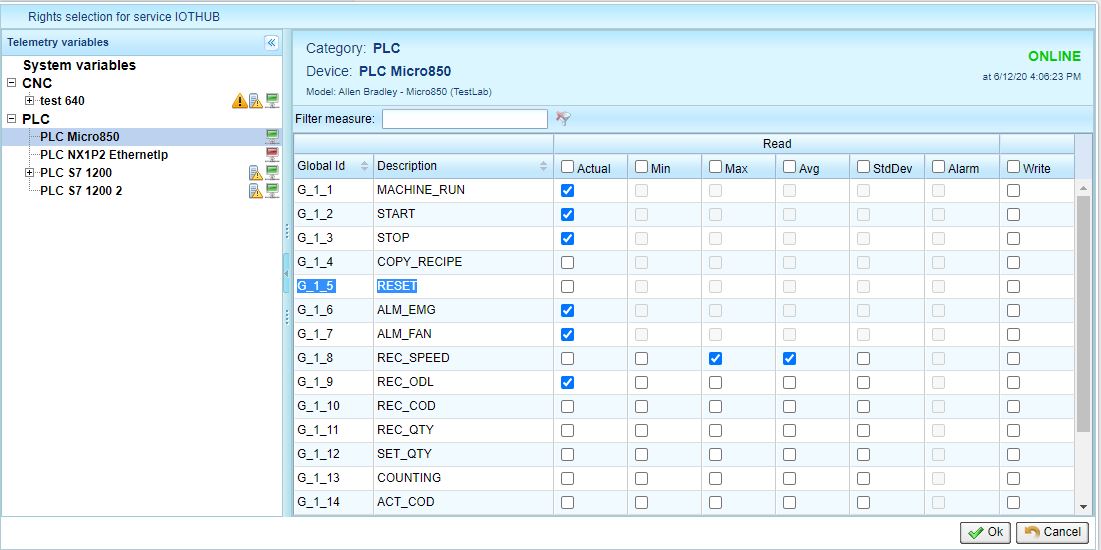
Now you can set time interval between sending next telemetry message and make other settings. It will send messages only for variables/alarms with read/write/alarm rights.

You can set these rights in Access/rights/alarms/events.
Write permission can be enabled only for measures which can be modified from outside. The alarms’ permissions (A) can be enabled only for measures defined as an alarm in Xmod driver.
Finally, check the checkbox Start IoT Hub service to activate.
To found the ConnectionString on IoT Hub Azure you can follow these steps:
1 - After the IoT hub has been created successfully, open the blade of the new IoT hub, take note of the hostname URI, and click Shared access policies.
2 - Select the Shared access policy called iothubowner, then copy and take note of the connection string on the right blade.
3 - This connection string enables application Alleantia ISC to perform management operations on the IoT hub such as adding a new device to the IoT hub.
Do you need more help?
Check the manual at this link:
Alleantia Azure IoT HUB USER MANUAL
If you need support don't hesistate to contact us
