Do you want to collect and view in real-time all the data collected by the machines using AMAZON WEB SERVICE (AWS)? Discover AWS IoT Alleantia Plugin.
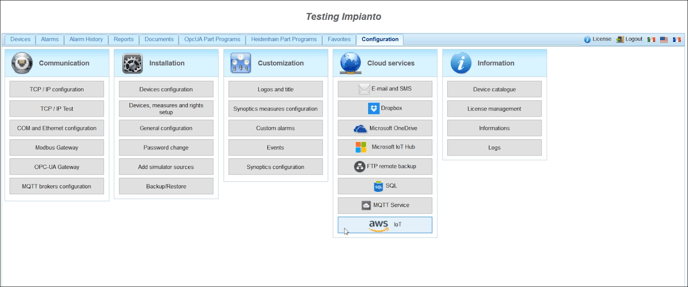
1) Start IotScada, go to Configuration tab and click on AWS IoT
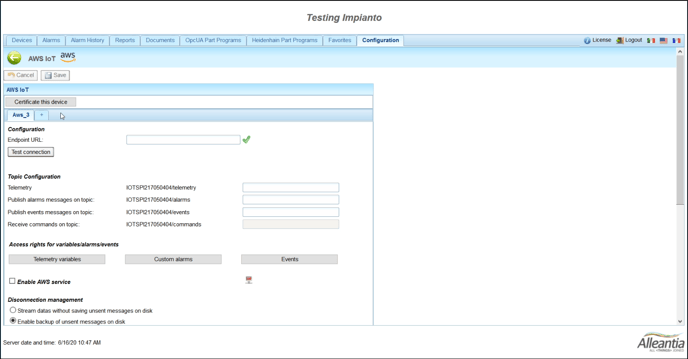
2) Click on Certificate this device button
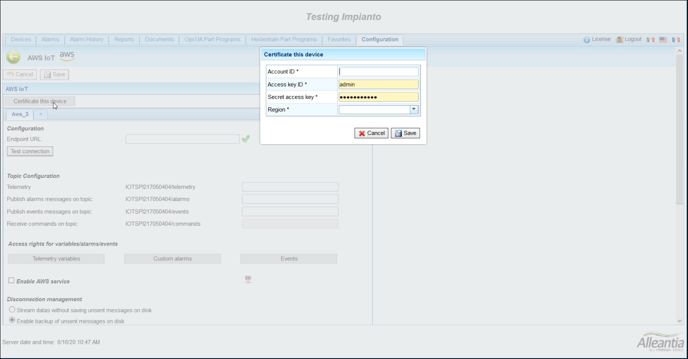
3) A Click will open a popup where you will need to enter Account ID, Access Key ID, the Secret access key and the Region
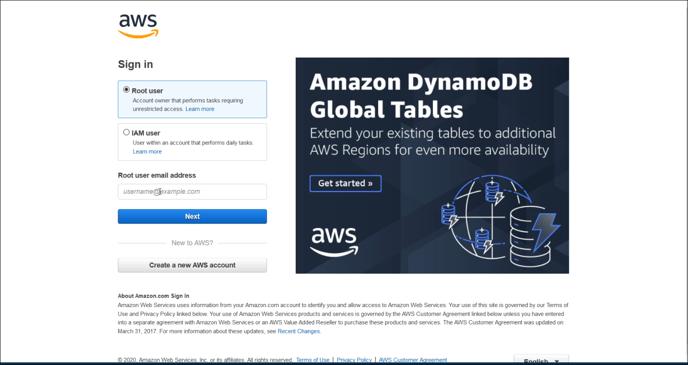
4) Go to AWS.amazon.com and log in with your credentials.
5) When the service starts, various information will be displayed, including the account id.
Copy the account id and enter it in the respective box.
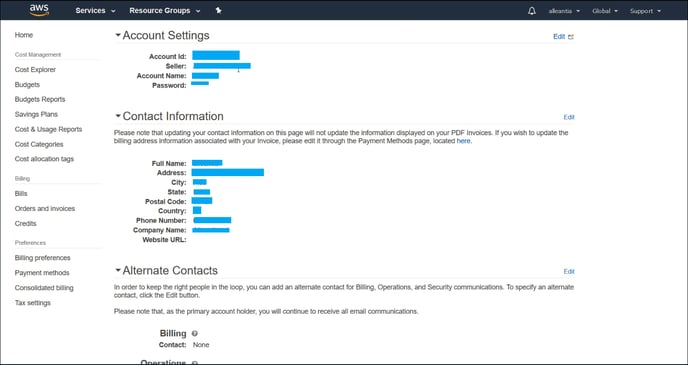
6) The KeyID access and the SecretKeyId are the credentials of an IAM USER who has the administrator rights.
Therefore you can enter the credentials of your user if you already have it or create one.
To create it go to the search bar and look for IAM
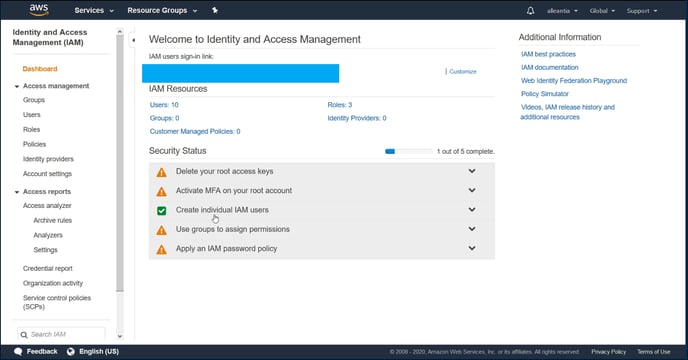
- On the IAM role page, click on the Create individual IAM users button.
- Then click on add user
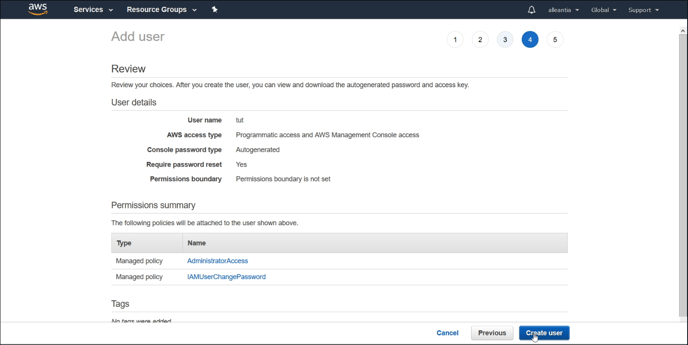
- Select a username and make sure to tick both boxes and click on next Permissions
- After this, go to Attach existing policies directly and give AdministratorAccess as permissions and Click on next.
- On the next page click again on next.
- At this point, a summary page is reached where all the information entered is present. If everything is correct, click on Create User.
- On the following page, you can see the Access Key Id and the Secret Access Key.
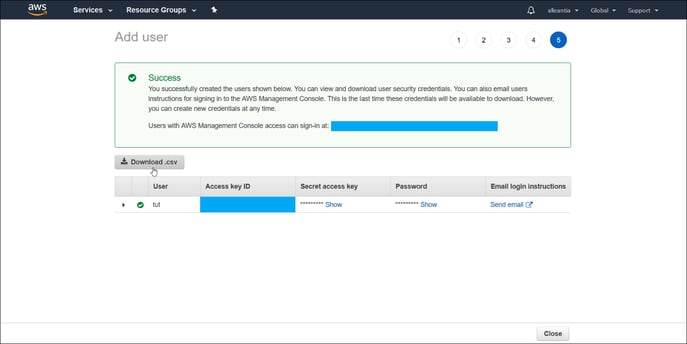
- It is also possible to save a CSV with this information to have a local backup.
7) Copy the two pieces of information and paste it into our previously opened popup.
By clicking on close to returning to the main page.
8) Once you reach the main page, search for iotcore, and click on Settings.
9) Observe the region from the endpoint shown and set it in the checkbox of our software.
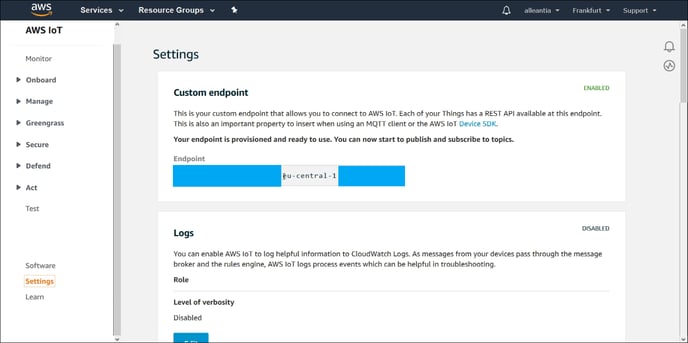
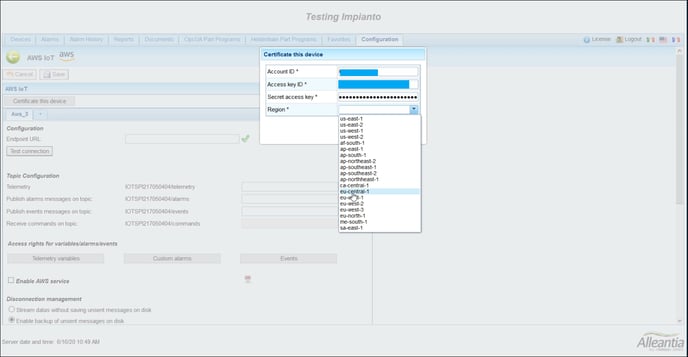
10) Click on save to return to the main screen.
11) Return to AWS and copy the entire endpoint and copy it to the respective textbox.
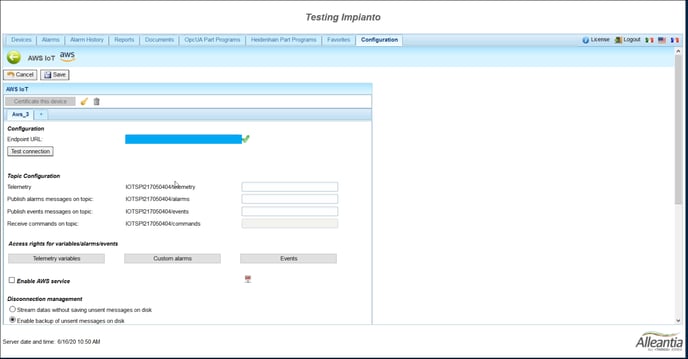
12) Once done, click on the check to save the endpoint.
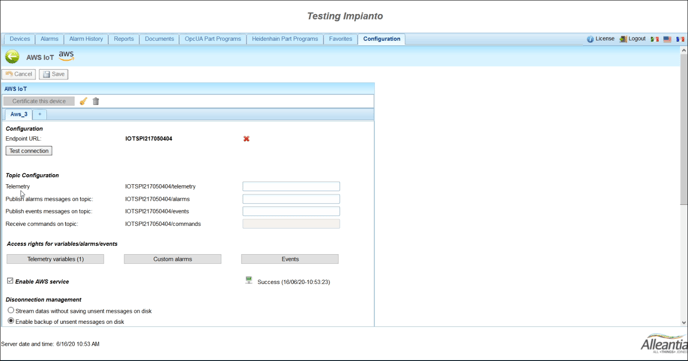
13) To test the connection you must first save everything with the Save button.
14) You can immediately select the checkbox to enable saving the AWS plugin having selected at least one variable to send.
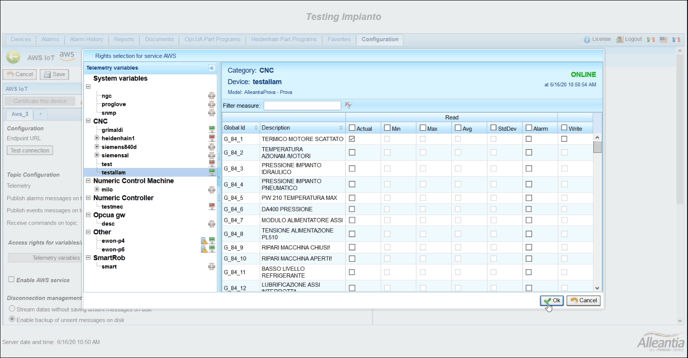
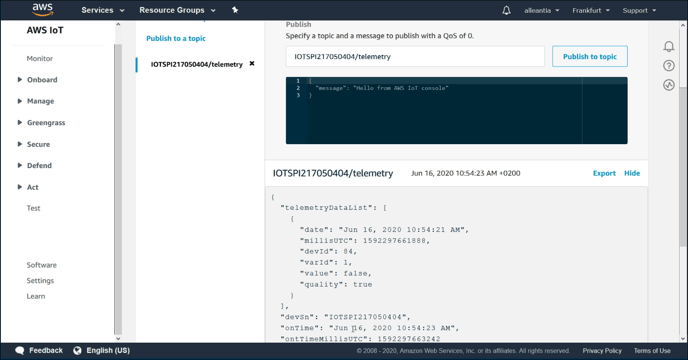
15) Save the changes and the successful check of the sending of the data, it is possible to check the sent messages from the AWS platform.
16) Go back to AWS and on the same page click on the test
17) then click on "subscribe to a topic" and copy the topic on which you send the data.
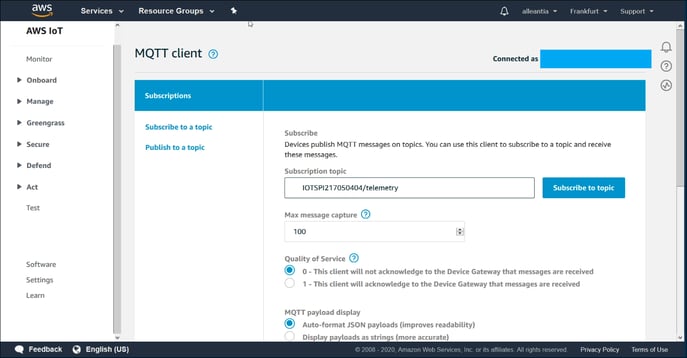
18) Click to Subscribe to topic.
19) Waiting for the sending time, the desired message will appear.
Have a look at the video tutorial:
If you need support don't hesistate to contact us
